(1) We're going to put to one side our "StaticImage.xcodeproj" for this post, but we will return to it in later posts, so don't trash it just yet.
(2) Following the steps laid down in the first "Xcode from scratch for scaredy cats" post we are going to create a "New Project..." called "PushButton".
(3) We are then going to navigate once again to the .xib file, this time called PushButtonViewController.xib (if it is called ViewController.xib, or something else, then you forgot to type "PushButton" in the "Class Prefixes" box when you named the app)
(4) Now create a button by displaying the right-hand column of the Xcode application window and dragging it from the list of objects at the bottom of the column (as we did with an "Image View" in the first blogpost)

(5) Next we need to select the "Navigate" menu from the top menu bar in Xcode, and from here click "Open in Assistant Editor" the result should be that we now have two screens displaying the same PushButtonViewController.xib file

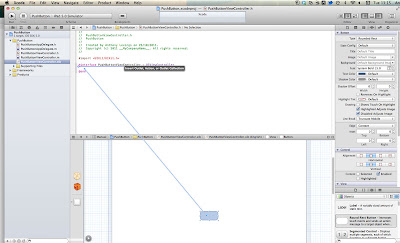
(6) Select now PushButtonViewController.h with a single click and it should appear in one of the windows. Now we need to "wire it up" to the button. We do this by holding down Control then click dragging the "wire" from the button in the PushButtonViewController.xib to the text of the PushButtonViewController.h file between the lines:
@interface PushButtonViewController : UIViewController
@end
then simply release the click.

(7) This opens a dialogue box, which should have its "Connection" set to "Action" its name to sender its "Type" to "UIButton" and its "Event" to "TouchUpInside" as you can see in this picture:

(8) Doing the above creates two pieces of code. The first you will see instantly in the PushButtonViewController.h file. It reads
- (IBAction)sender:(id)sender;
and there is a corresponding line of code in PushButtonViewController.m automatically inserted at the bottom of the file before "@end" that reads:
- (IBAction)sender:(id)sender {
}
(9) navigate to the new line of code that Xcode has inserted in PushButtonViewController.m and insert the line:
self.view.backgroundColor = [UIColor blueColor];
between the curly braces so it looks like this
- (IBAction)sender:(id)sender {
self.view.backgroundColor = [UIColor blueColor];
}

(10) Finally, click "Run" and you'll have the app running - simply press the button and see what happens.
Comments
Post a Comment